最近有空, 搞一搞fastlane 一键打包发布App store / testflight / fir.com
相关资料
安装fastlane
brew install fastlane
fastlane的安装和使用
Fastlane 官方文档
fastlane自动化打包(android)
fastlane - fastfile一些基础
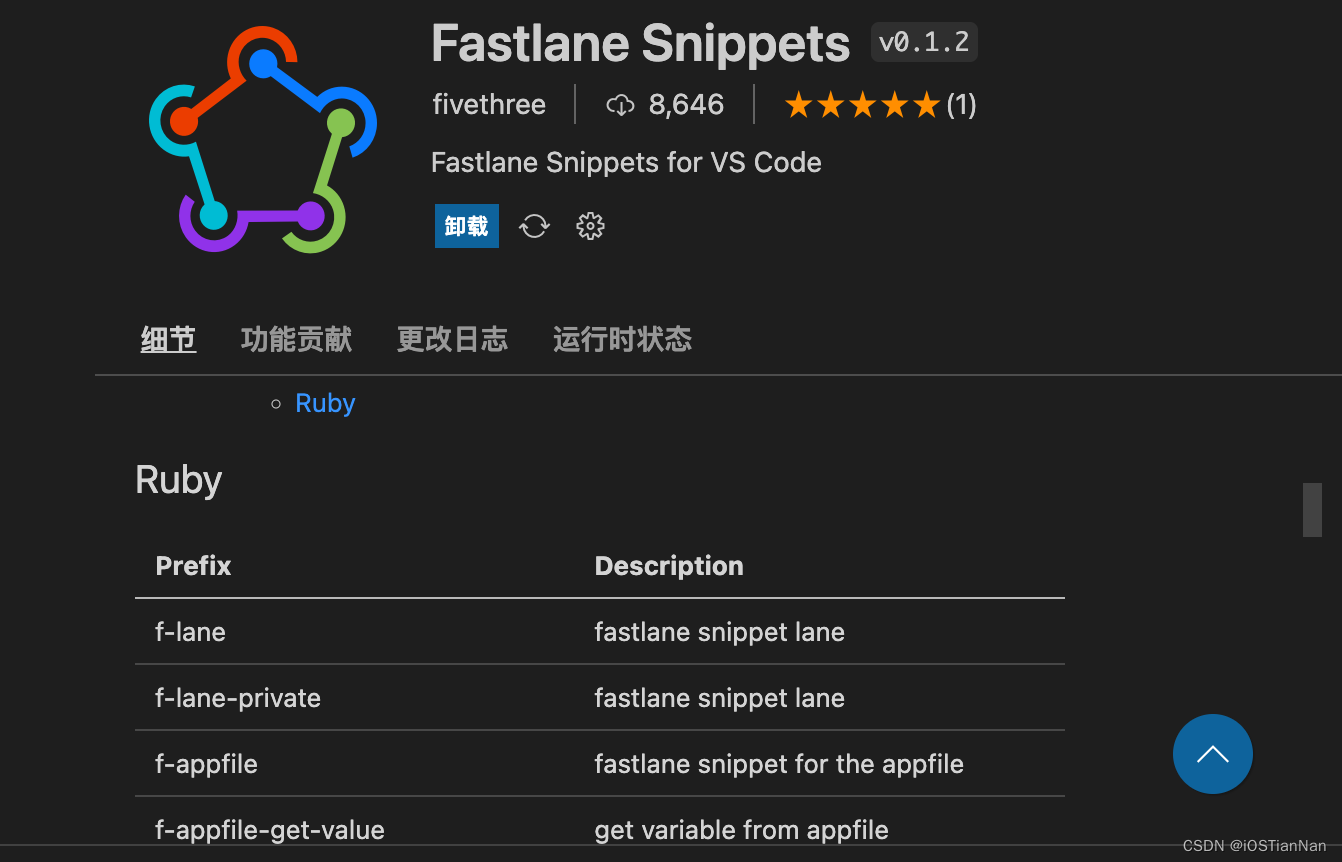
idea使用vs code , 可以安装一些代码片段插件,快速上手
如何传参
传参写法
desc "Add description of lane"
lane :test1 do |options|
  puts(options[:arg1])
  puts(options[:arg2])
  puts(options[:arg3])
end
命令行调用
fastlane test1 arg1:a arg2:b arg3:c
日志输出
[✔] 🚀
[14:33:30]: ------------------------------
[14:33:30]: --- Step: default_platform ---
[14:33:30]: ------------------------------
[14:33:30]: Driving the lane 'ios test1' 🚀
[14:33:30]: a
[14:33:30]: b
[14:33:30]: c

+------+------------------+-------------+
|           fastlane summary            |
+------+------------------+-------------+
| Step | Action           | Time (in s) |
+------+------------------+-------------+
| 1    | default_platform | 0           |
+------+------------------+-------------+

[14:33:30]: fastlane.tools finished successfully 🎉
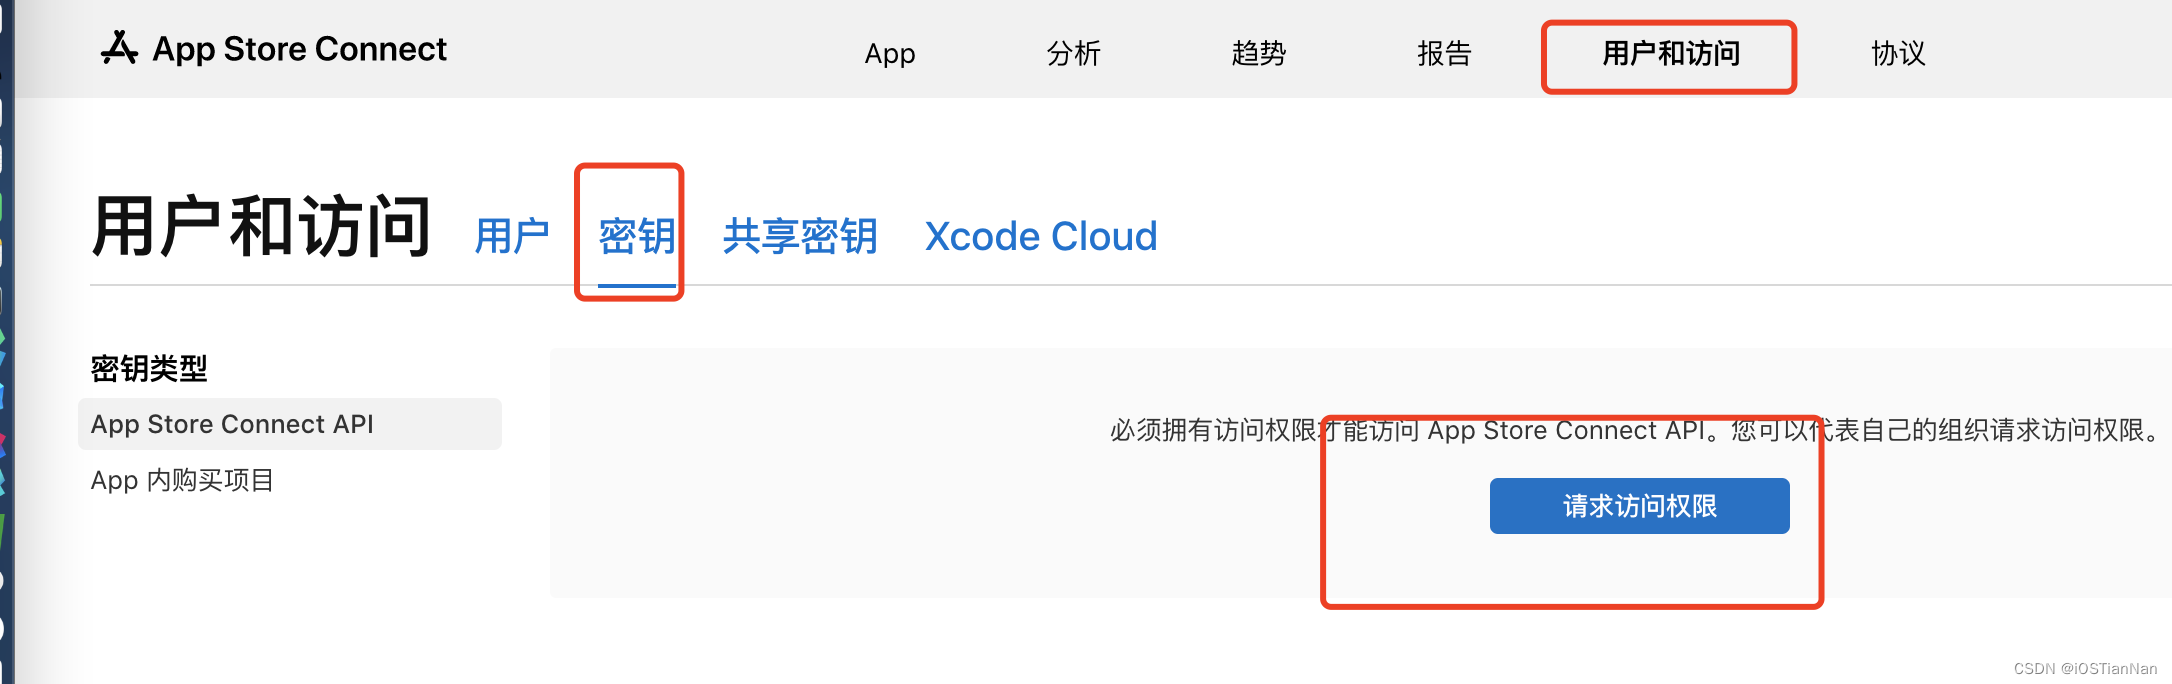
issuer_id
这个必须是主账户才能看到
如果提示找不到 p8 file, 记得检查一下路径, 要在fastlane 路径下, 如果是
./路径, 会报错
key_filepath: ‘./fastlane/AuXXXX.p8’,
app_store_connect_api_key(
  key_id: "D83848D23",
  issuer_id: "227b0bbf-ada8-458c-9d62-3d8022b7d07f",
  key_filepath: "D83848D23.p8",
  duration: 200,
  in_house: true
)
iOS端 步骤 (默认已经做好环境配置)
1.cd ios
2.fastlane init
3.编写 Fastfile 文件
4. .p8文件放入 ./fastlane文件目录
5. Fastfile文件代码如下
# This file contains the fastlane.tools configuration
# You can find the documentation at https://docs.fastlane.tools
#
# For a list of all available actions, check out
#
#     https://docs.fastlane.tools/actions
#
# For a list of all available plugins, check out
#
#     https://docs.fastlane.tools/plugins/available-plugins
#

# Uncomment the line if you want fastlane to automatically update itself
# update_fastlane

default_platform(:ios)
platform :ios do

  desc "test"
  lane :test do |options|
    #add actions here
    puts(Dir.pwd)
    puts("test ----> 1")

  end

  desc "打包iOS+上传"
  lane :app do |options|

    # 数据变量部分
    targetName = "channelMarketing"
    scheme = targetName
    fastlane = "fastlane"
    ipa = "ipa"
    workspace = targetName+".xcworkspace"
    workspace_path = './'+workspace
    output_directory = './'+fastlane+"/"+ipa
    output_name = targetName + ".ipa"


    # 自增build版本号
    increment_build_number()

    gym(
      clean:true, # 打包前先clean一下
      workspace:workspace,
      configuration:'Release',
      scheme:scheme,
      silent:false, # 隐藏构建时不需要的所有信息 默认false
      output_directory:output_directory,
      output_name:output_name,
      include_symbols:true,
      export_method: 'app-store', # app-store | ad-hoc | development 等
      export_xcargs: '-allowProvisioningUpdates'
    )

    # 获取ipa路径
    ipa_file_path = lane_context[SharedValues::IPA_OUTPUT_PATH]

    # 获取ipa基本信息
    app_name = get_ipa_info_plist_value(ipa: ipa_file_path, key: "CFBundleDisplayName")
    package_name = get_ipa_info_plist_value(ipa: ipa_file_path, key: "CFBundleIdentifier")
    version_name = get_ipa_info_plist_value(ipa: ipa_file_path, key: "CFBundleShortVersionString")
    version_code = get_ipa_info_plist_value(ipa: ipa_file_path, key: "CFBundleVersion")

    puts("iPA基本信息: app_name = " + app_name);
    puts("iPA基本信息: package_name = " + package_name);
    puts("iPA基本信息: version_name = " + version_name);
    puts("iPA基本信息: version_code = " + version_code);

    # 复制一份ipa + 修改复制文件 包名
    sh("open ./ipa")
    changeName_cp = "cp"
    changeName_file_org = "./"+ipa+"/"+output_name
    changeName_file_new = "./"+ipa+"/"+targetName+"_"+version_name+"_"+version_code+".ipa";
    sh(changeName_cp +" "+ changeName_file_org +" "+ changeName_file_new)


    # 3.上传
    api_key = app_store_connect_api_key(
      key_id: 'xxxxxxx',#自行配置
      issuer_id: 'xxxxxxx',#自行配置
      key_filepath: './fastlane/xxxxxx.p8', #自行配置
      duration: 1200,
      in_house: false
    )
    # 上传到testflight
    upload_to_testflight(
      # 上边设置的授权信息
      api_key: api_key,
      skip_waiting_for_build_processing: true,
      # 打包好要上传的文件
      ipa: ipa_file_path,
      skip_submission: true
    )

  end


 # 提交一下git
  after_each do |lane, options|
    # ...
    puts(Dir.pwd)
    # 提交变动的build号
    sh("cd .. && cd .. && git add . && git commit -m -a")
  end

end
android端 步骤 (默认已经做好环境配置)
1.cd ios
2.fastlane init
3. 安装一些插件
fastlane add_plugin firim
安装插件的一些坑
踩坑1:

踩坑2 上传 fir.im
可是使用fastlane的插件 fir-im, 这里我采用了fir-cli, 直接走脚本上传了,
直接用fir-cli提供的命令行工具
在 lane中添加 就可以上传
sh "fir publish xxxxx your apk file xxxxxxx  -T xxxxxxxxyou tokenxxxxxxxx"
当然安装插件的踩坑也是有的,主要是因为 Gemfile文件路径的问题
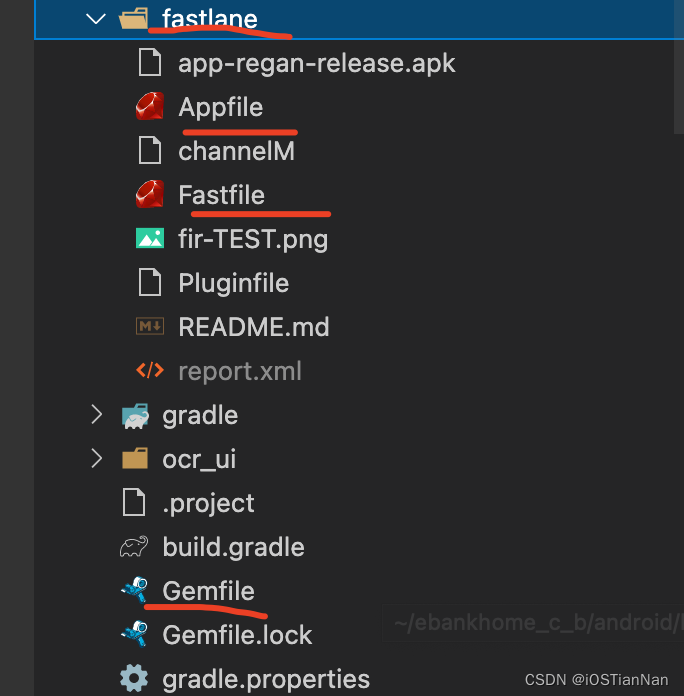
安卓根目录下 Gemfile 与 fastlane 同级
Could not find gem 'fir' in any of the gem sources listed in your Gemfile.
报错:
由于我在Android项目根目录下创建的 fastlane init 所以,Gemfile文件里面 plugins_path要注意下获取路径
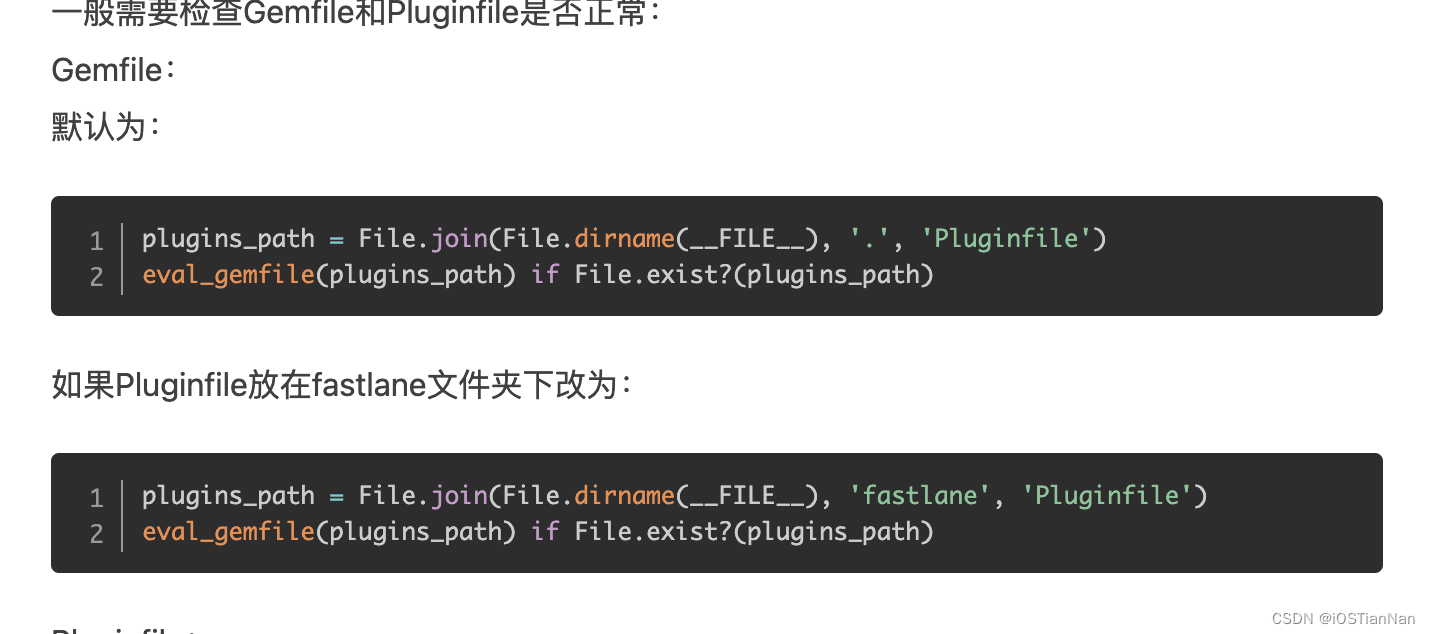
原Gemfile文件对 plugins_path路径的写法为:
plugins_path = File.join(File.dirname(__FILE__), '.', 'Pluginfile')
eval_gemfile(plugins_path) if File.exist?(plugins_path)
这边改为:
plugins_path = File.join(File.dirname(__FILE__), 'fastlane', 'Pluginfile')
eval_gemfile(plugins_path) if File.exist?(plugins_path)
fir.im:80报错:
遇到这个报错,主要还是fir-cli的版本过低,新版本升级后就替换了新域名
fir.im 更换域名至 betaqr.com 后, 需要升级至 fir-cli >= 2.0.4 有部分用户反馈 2.0.2 无法直接使用 gem update fir-cli 升级到 2.0.4, 则可以尝试卸载后重新安装, 即 gem uninstall fir-cli 后 gem install fir-cli
踩坑3: lane 中执行 sh "fir version"失败
can't find executable fir for gem fir-cli. fir-cli is not currently included in the bundle, perhaps you meant to add it to your Gemfile? (Gem::Exception)
问题还是出在Gemfile中, 确保其中有
gem "fastlane"
gem "fir"
Fastfile文件:
# This file contains the fastlane.tools configuration
# You can find the documentation at https://docs.fastlane.tools
#
# For a list of all available actions, check out
#
#     https://docs.fastlane.tools/actions
#
# For a list of all available plugins, check out
#
#     https://docs.fastlane.tools/plugins/available-plugins
#

# Uncomment the line if you want fastlane to automatically update itself
# update_fastlane

default_platform(:android)

platform :android do

  desc "package"
  lane :app do |options|
    gradle(
      task: 'assemble',
      build_type: 'Release',
      properties: {
        "android.injected.signing.store.file" =>  Dir.pwd + "/xxxxx",
        "android.injected.signing.store.password" => "xxxxxxxx",
        "android.injected.signing.key.alias" => "xxxxxx",
        "android.injected.signing.key.password" => "xxxxxxxx",
      },
    );


  end

  after_each do |lane, options|
    # ...
    apk_name = "xxxxxx.apk"
    apk_path = Dir.pwd+"/"+apk_name
    fir_token = "xxxxxxxxxxxxxxxxxxxxxxxxxxxxxxxxxxxx"

    apk_file_path = lane_context[SharedValues::GRADLE_APK_OUTPUT_PATH];
    build_type = lane_context[SharedValues::GRADLE_BUILD_TYPE];

    sh("cp #{apk_file_path} #{apk_path}")
    sh("fir version")
    sh("fir login #{fir_token}")
    sh "fir me"
    sh "fir publish #{apk_path}"
    sh("open .")
  end


end
2022/10/20
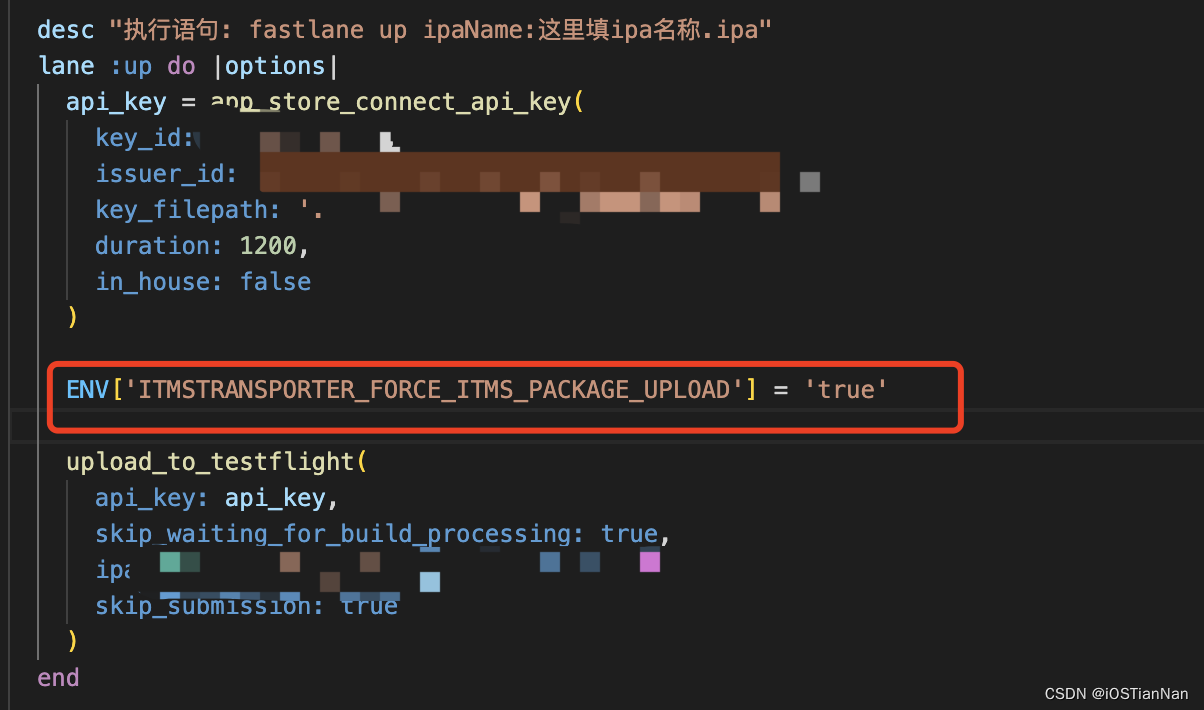
踩坑4: An exception has occurred: issuerId is required
自动化打包报错 - issuerId is required
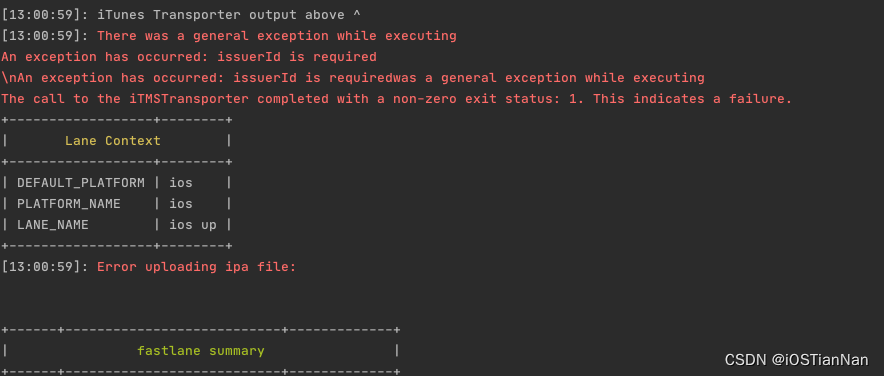
是由于近期 iTMSTransporter版本3.0.0造成的, 换回2.3.0版本即可,
也可以通过环境配置方案解决
ENV['ITMSTRANSPORTER_FORCE_ITMS_PACKAGE_UPLOAD'] = 'true'
—
2022/11/16
踩坑5: xattr -w com.apple.xcode.CreatedByBuildSystem true 问题
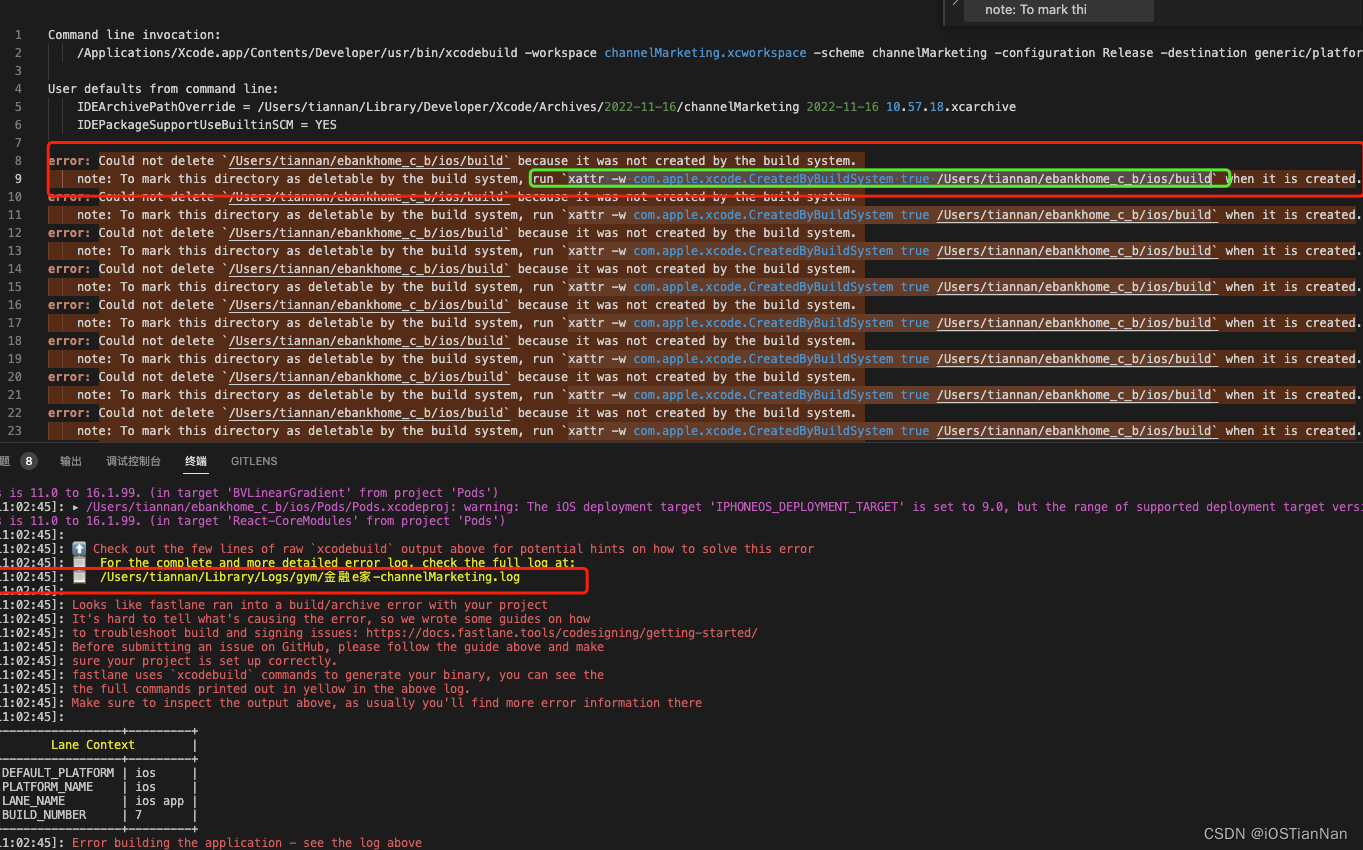
最新更新的XCode14, 编译出现build文件夹, 按要求在脚本里执行删除语句即可

![ReactNative:Running ‘[node, -e, console.log(require(‘react-native/cli’).bin);]’ command failed.](https://img-blog.csdnimg.cn/cab3b8cce3f34ffbad936d1eddb9615d.png)